Material damage
The resonant frequency and internal friction measured using the impulse excitation technique can be seen as the fingerprint of a sample. If some event changes in the material structure of a sample this can be detected by measuring the resonant frequency and internal friction before and after the event.
Example 1: thermal shock
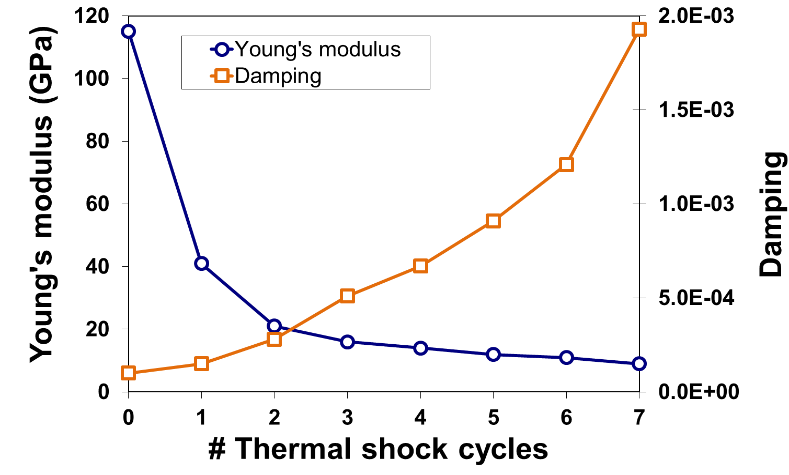
The most common method for examining thermal shock resistance involves cyclical heating of a material to a set temperature, fast cooling it with water or compressed air and counting the number of cycles until the material was visually damaged. One of the major disadvantages of this procedure is the lack of information about what is happening with the sample between the different thermal shock cycles. By accurately measuring the elastic properties and damping of the same sample between every thermal shock cycle, we get a clear view of the degradation process of the sample’s mechanical properties due to crack propagation.
The figure bellow shows an example of the thermal shock behaviour of a high alumina refractory castable. During the first thermal shock cycles, the Young’s modulus degrades significantly. This is explained by the crack formation in the grain boundaries. Further thermal shock cycles induce crack formation inside the grains themselves, resulting in increased damping (internal friction) values until the fatal failure of the sample is reached [1].
References
- T. Tonnesen, R. Telle. Evaluation of Thermal Shock Damage in Castables by a Resonant Frequency and Damping Method. Proc. 49. Int. Feuerfest-kolloquium, pp. 133-136, 2006

